LED Wall Setup and Rigging: Difference between revisions
Jump to navigation
Jump to search
Created page with "We have various techniques to set up our LED walls. Here is references for each method. == Top Hung == === Mega Hanger ===" |
No edit summary |
||
| Line 1: | Line 1: | ||
This page coves reference materials pertaining to our LED walls. It has example images of rigging techniques as well as config reference. | |||
== Configuration == | |||
== Rigging == | |||
We have various techniques to set up our LED walls. Here is references for each method. | We have various techniques to set up our LED walls. Here is references for each method. | ||
=== Top Hung === | |||
[[File:Megaclamp full wall.png|thumb|right|Megaclamp full wall]] | |||
==== Mega Hanger ==== | |||
When top hanging using Mega Hangers, space the clamps out according to specifications in the images here. | |||
<gallery mode="packed"> | |||
File:Megaclamp with dims.png | front view with dims | |||
File:Mega Hanger Section.png | section view | |||
</gallery> | |||
=== Ground Support === | |||
[[File:Ground support.png|thumb|right|Ground supported LED wall]] | |||
== | <gallery mode="packed" heights="200"> | ||
File:Ground Support back.png | Back view of ground supported wall | |||
File:Ground Support Side view.png | Side view, note cheesborughs are not drawn | |||
</gallery> | |||
Revision as of 13:36, 23 July 2024
This page coves reference materials pertaining to our LED walls. It has example images of rigging techniques as well as config reference.
Configuration
Rigging
We have various techniques to set up our LED walls. Here is references for each method.
Top Hung

Mega Hanger
When top hanging using Mega Hangers, space the clamps out according to specifications in the images here.
-
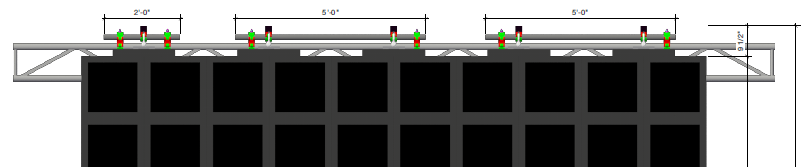 front view with dims
 -
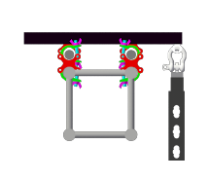 section view


Ground Support

-
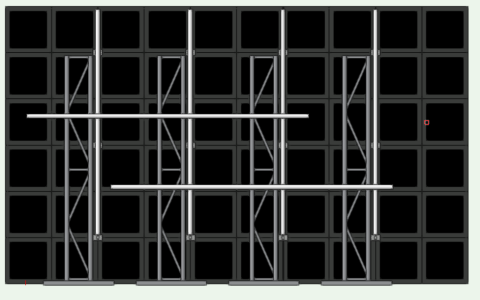 Back view of ground supported wall
 -
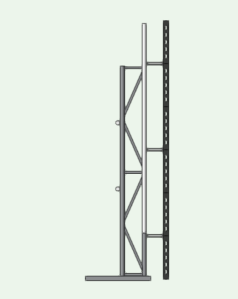 Side view, note cheesborughs are not drawn

